Get started: Connect the WhatsApp Business API
This article explains how to connect a WhatsApp Business API account to Saysimple.
After completing this setup, you can send and receive WhatsApp messages through the Saysimple platform.
Requirements
Before you start, make sure all requirements below are met.
If one of these requirements is missing, the setup may fail.
A Meta Business Manager account.
A phone number that is not connected to WhatsApp or the WhatsApp Business App.
The phone number can receive SMS or voice calls.
Admin access to your Saysimple workspace.
Important: Personal WhatsApp and WhatsApp Business App accounts are not supported.
Meta Business Manager
You need a Meta Business Manager account to sign up for a WhatsApp Business Platform (API) account. If you don’t have a Meta Business Manager account yet, you can create one during the sign up flow.
Make sure that your business complies with the WhatsApp Business Messaging Policy.
Make sure that you have access as an admin in the Meta Business Manager (MBM).
The website linked to your Meta Business Manager must be live and publicly accessible.
What Meta considers a valid website:
Live and reachable
Publicly accessible
Clearly represents your business
Functional and complete (includes at least basic pages like: home, about, contact)
Uses a proper domain (e.g. yourcompany.com)
Secure and compliant (HTTPS enabled)
Including a valid website in your Meta Business Manager is strongly recommended. It ensures your business verification with Meta goes smoothly and reduces the risk of delays or rejections.
Phone number
Use your own number:
The phone number must be valid. The phone number can receive SMS or voice calls.
If your number is already in use on the WhatsApp Personal App or the WhatsApp Business App, you need to delete it first.
⚠️ Important: Please note that all account data (including your chat history & files) will be deleted! To prevent this from happening you can change the number within your WhatsApp account. Then the account information will be transferred from the old phone number to the new number.
You phone number must not be from any of the following restricted countries: Ukraine (Crimea, Donetsk, Luhansk), Cuba, Iran, North Korea, Syria.
Use a free WhatsApp number provided by Meta
This number is intended for testing purposes only and should not be used in production.
You don’t need an existing WhatsApp account or phone number.
You cannot transfer this number to another WhatsApp account later.
Step-by-step: Connect your WhatsApp Business API account
Step 1: Log in to Saysimple
Log in to your Saysimple account using an account with administrator rights.
Step 2: Navigate to WhatsApp Settings
Navigate to:
Settings → Channels: WhatsApp Business → Create new channel
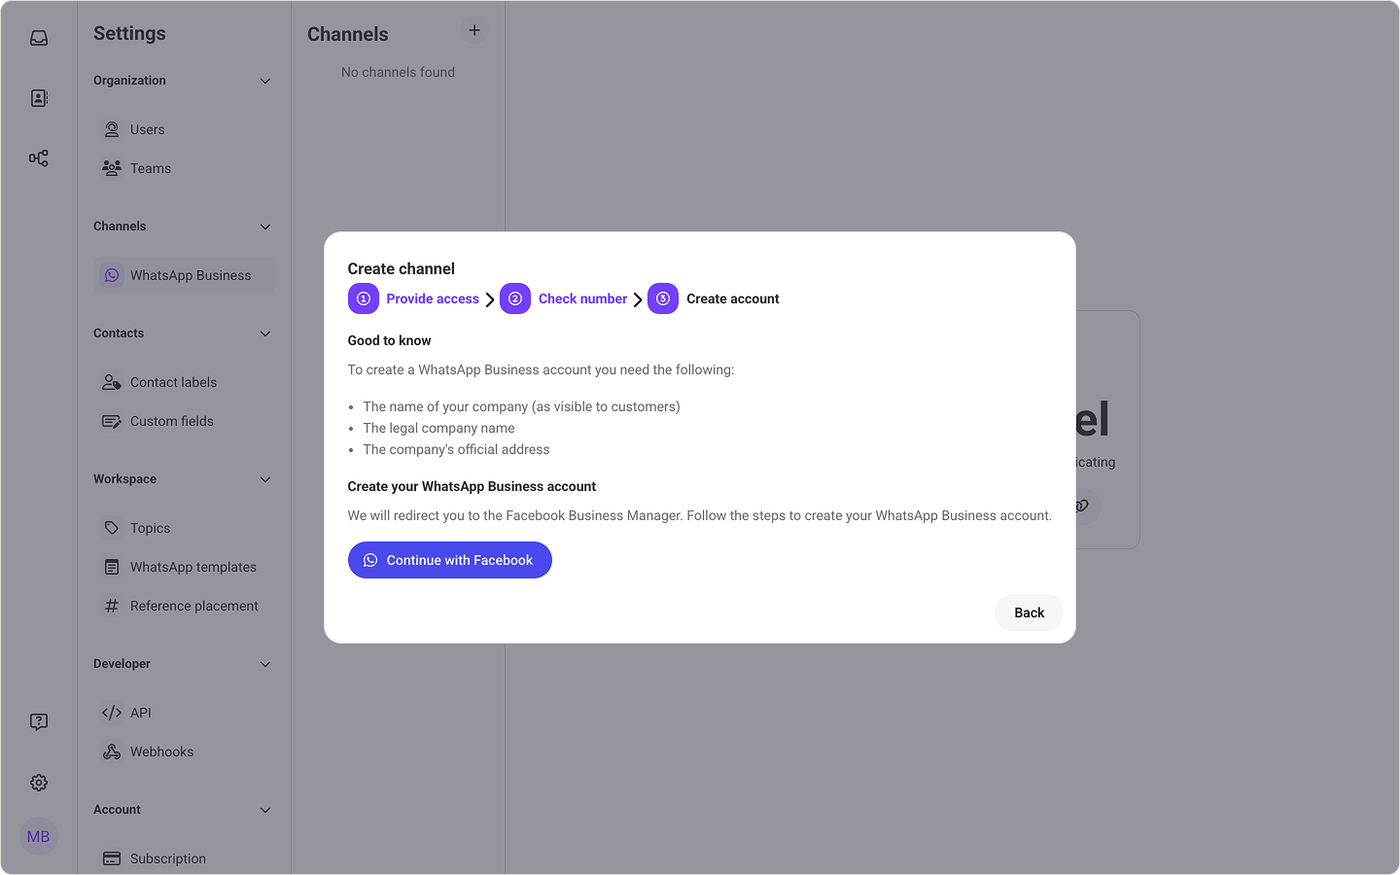
Step 3: Confirm WhatsApp Business API requirements
After clicking Create new channel, a setup modal opens.
In this modal, you confirm that you meet all requirements to connect a WhatsApp Business API account. You must check all boxes to continue with the setup.
If one or more requirements are not met, stop the setup and resolve them first.
Click Continue with Facebook to start the connection process within the Meta Business Manager.
Step 4: Log in to Meta Business Manager
Log in with the Meta account that has admin access to the correct Meta Business Manager.
If you manage multiple businesses, make sure you select the correct business during log in.
Step 5: Grant permissions
Meta asks you to grant permissions to Saysimple.
Review the requested permissions and click Continue to allow Saysimple to:
Connect your WhatsApp Business API account
Manage phone numbers
Send and receive WhatsApp messages on your behalf
These permissions are required to complete the connection.
Step 6: Select or create business assets
During setup, select or create the required business assets:
A Meta Business portfolio
A WhatsApp Business Account
If these assets do not exist yet, you can create them during this step by following Meta’s on-screen instructions.
Step 7: Add a WhatsApp phone number
Add the phone number you want to use for WhatsApp messaging.
You can:
Use your own business phone number
Use a virtual phone number provided by Meta (testing purposes only)
The phone number must not be connected to WhatsApp or the WhatsApp Business App and must be able to receive SMS or voice calls.
Step 8: Verify WhatsApp phone number
Meta sends a verification code to the phone number via SMS or voice call.
Enter the code when prompted to verify the phone number.
If verification is successful, Meta confirms the number and Saysimple completes the connection automatically.
Step 9: Review and confirm setup
Review the selected business assets, phone number and permissions.
Click Confirm to finalize the connection.
Step 10: Connection complete
Your WhatsApp Business API account is now connected! 🎉
You can now:
Send and receive WhatsApp messages
Assign conversations to team members
Configure automation and workflows
What’s Next?
To start sending outbound WhatsApp messages, you must create approved message templates.
Continue with:
Get Started: WhatsApp Templates
You can add additional WhatsApp phone numbers to your Saysimple workspace by starting the connection setup again.
During the setup, you can either add a new phone number to an existing WhatsApp Business API account or create a new one, depending on your Meta configuration.