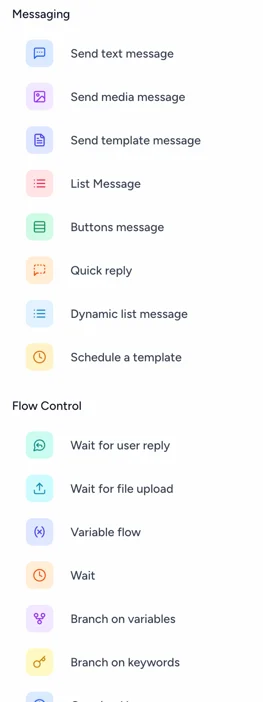
Flow Builder allows you to create automated conversation flows for your customers. In this article, you’ll learn how to access Flow Builder, create a new flow, and choose the trigger that starts your flow.
1. Open the Flow Builder app
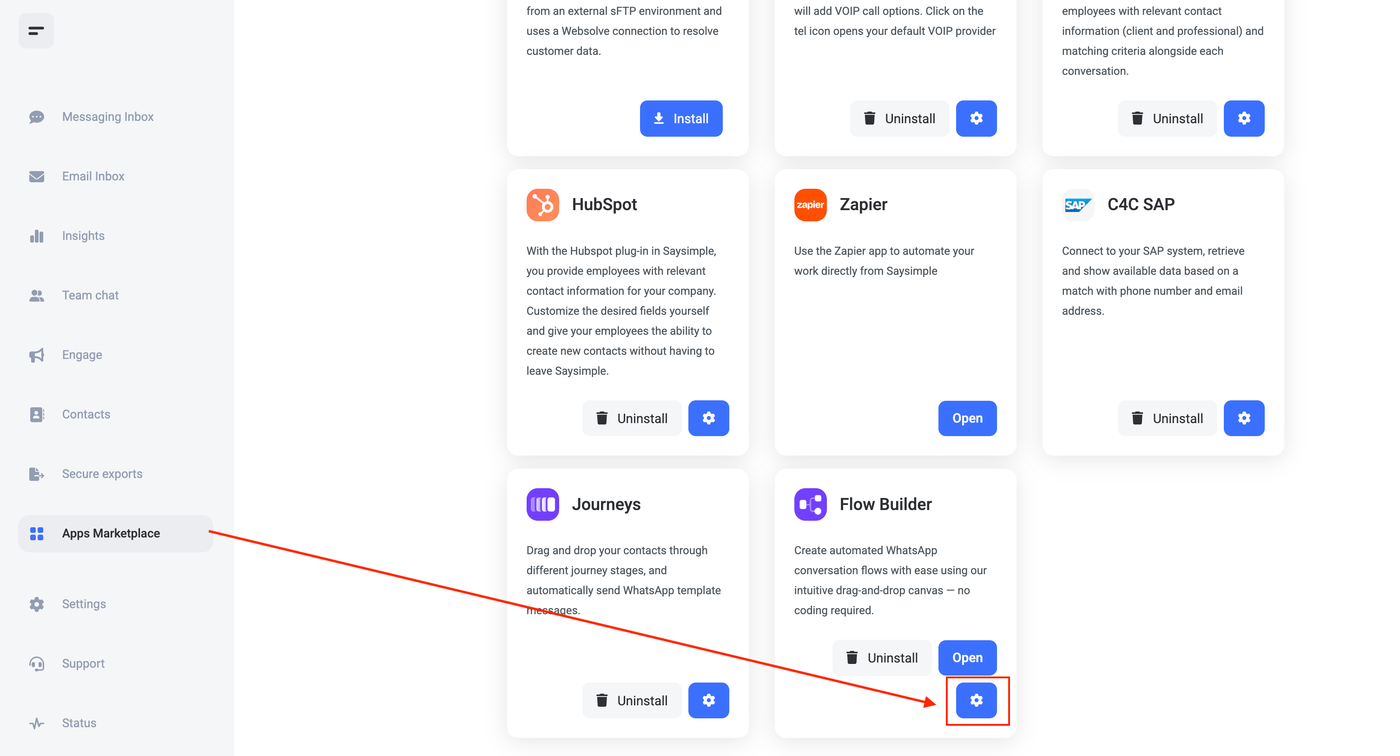
From Saysimple, go to App Marketplace and find the Flow Builder app.
Click the Settings icon to open the Flow Builder configuration.
2. Configure Flow Builder
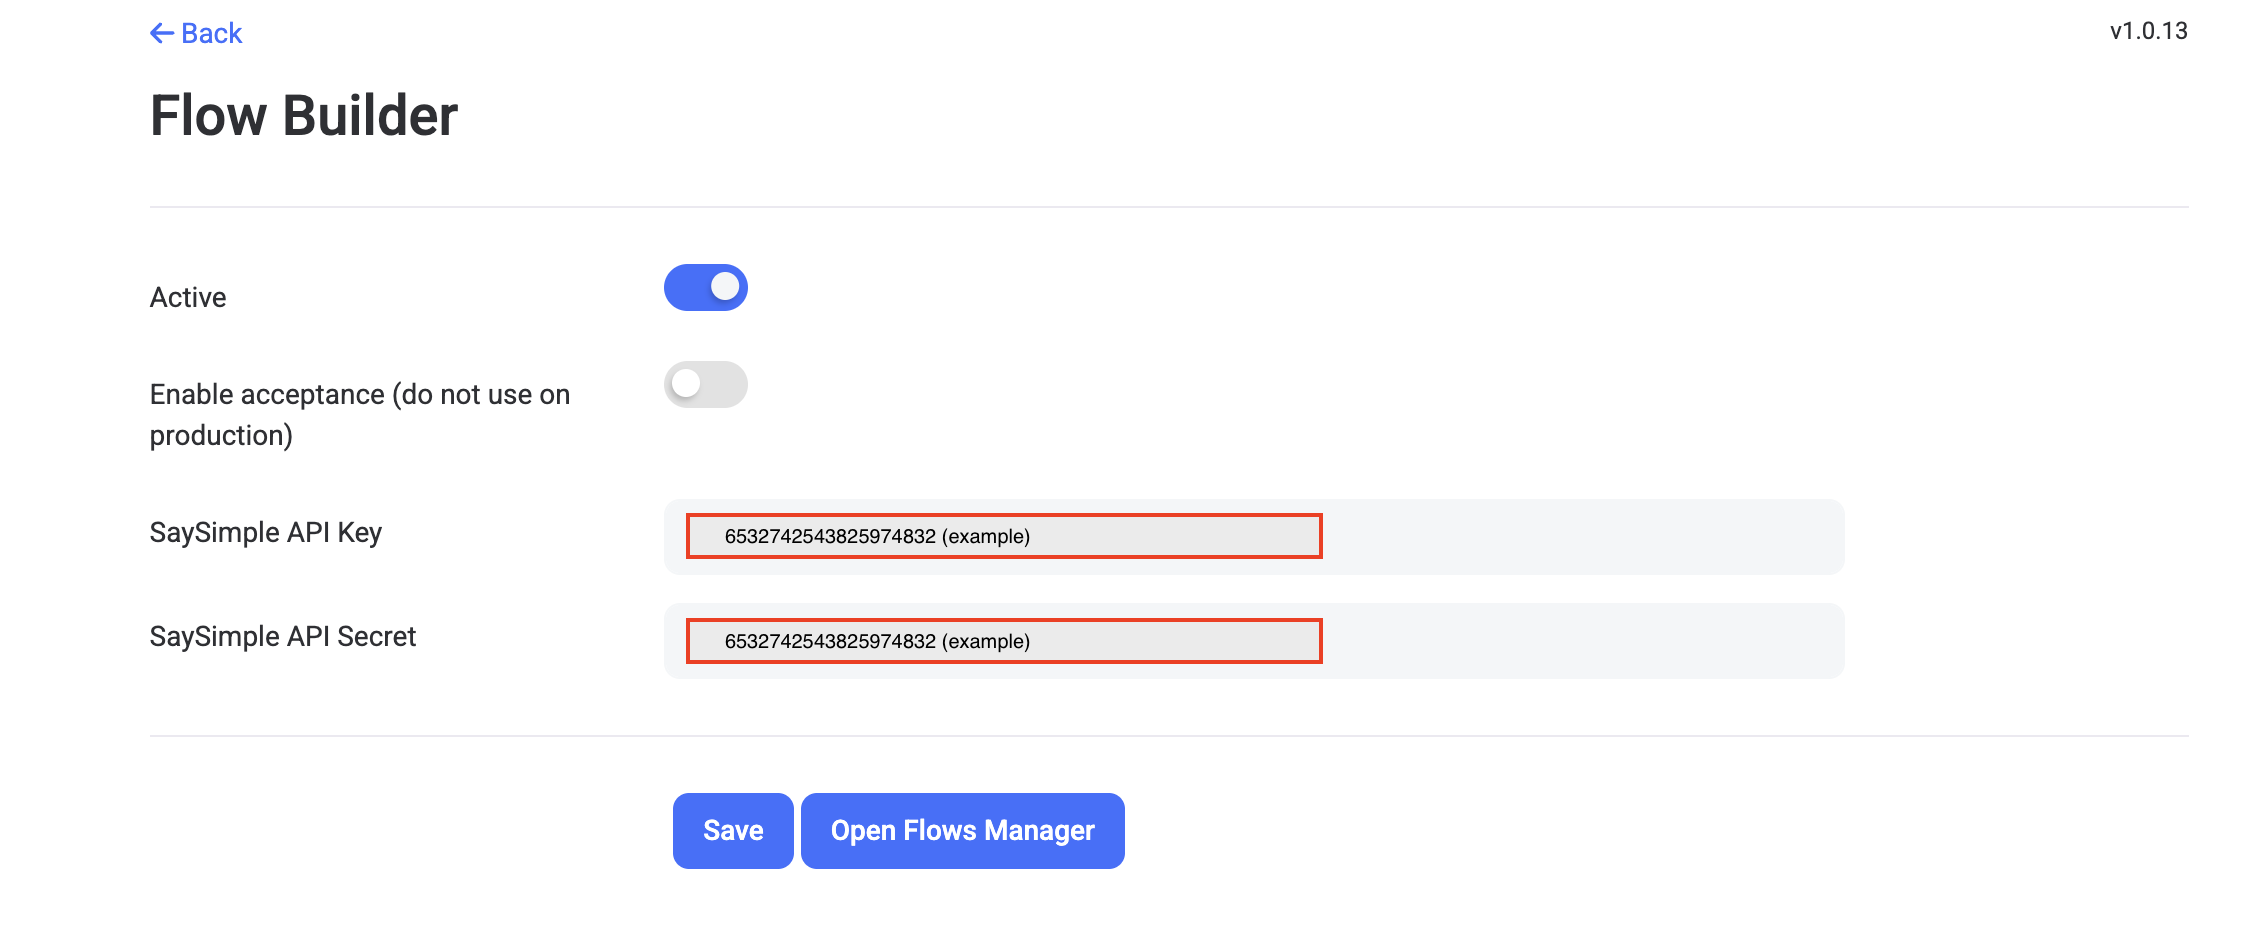
In the configuration screen:
Make sure Active is enabled.
Enter your API Key and API Secret.
Click Save.
Note: You’ll need a valid API Key and API Secret to use Flow Builder.
3. Open Flow Builder
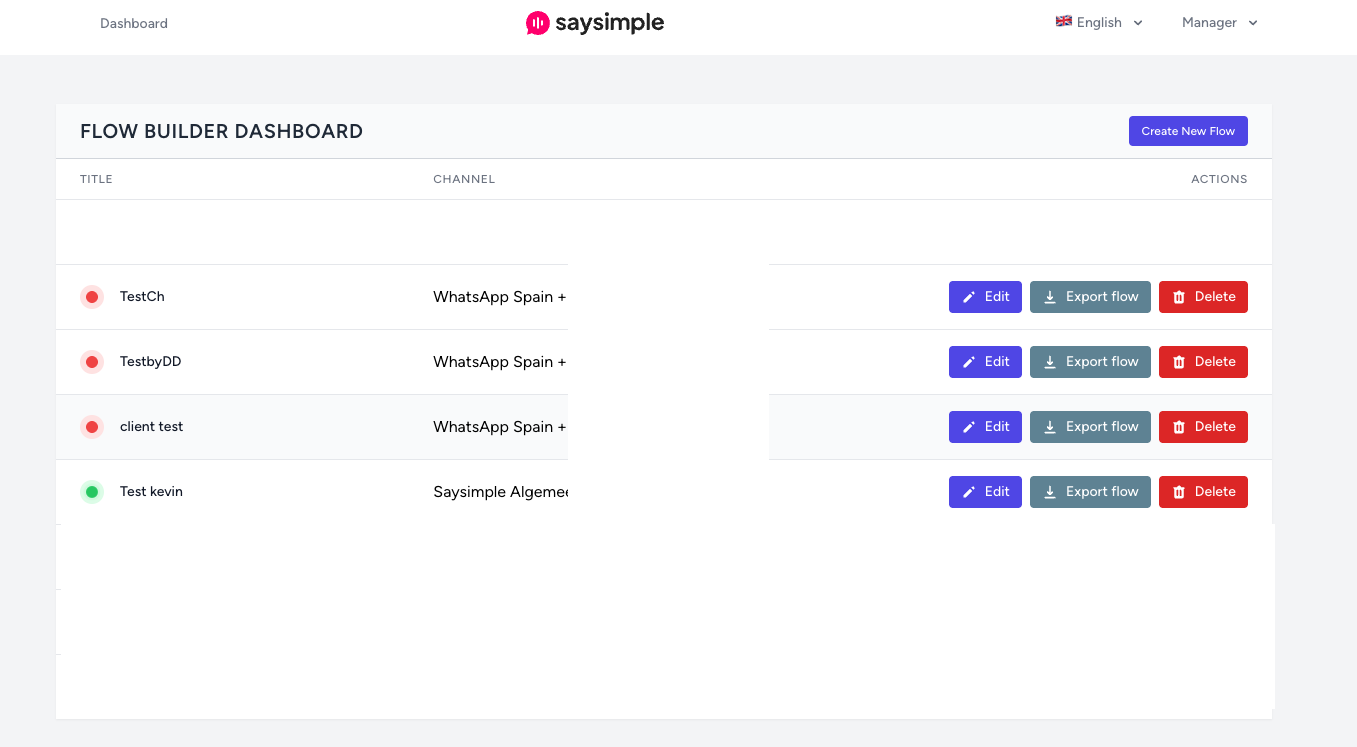
Go back to App Marketplace, find Flow Builder, and click Open.
You’ll see an overview of your existing flows. If you’re using Flow Builder for the first time, this list will be empty.
4. Create a new flow
Click Create new flow.
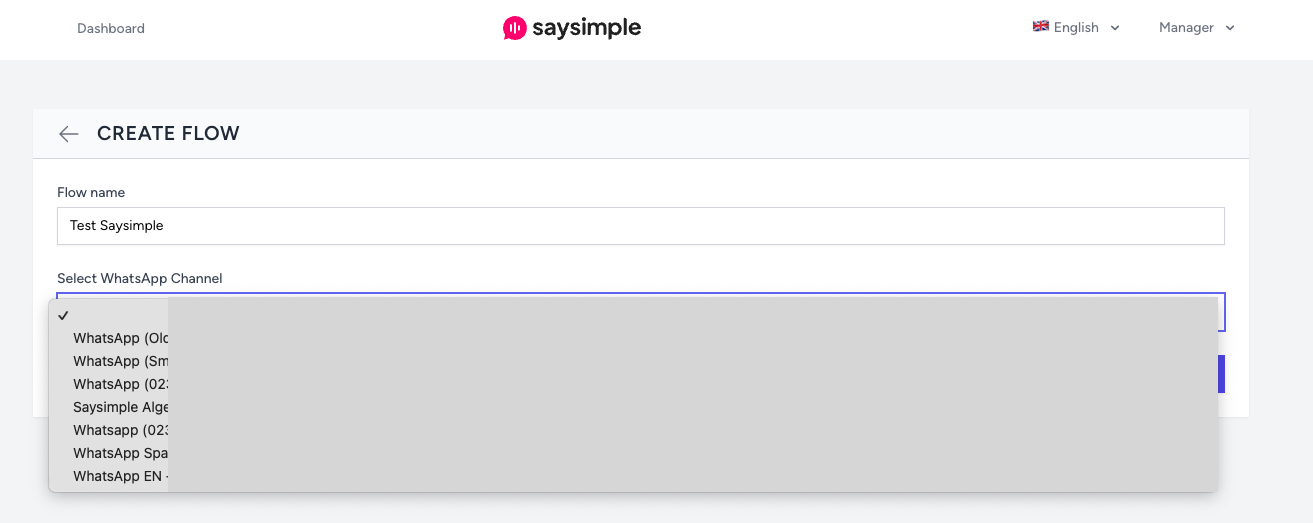
Enter the following information:
Flow name: Give your flow a clear and recognizable name.
Channel: Select the phone number you want to use with this flow.
Click Save when you’re done.
Your new flow will appear in the flow overview. A red status indicator means the flow is inactive.
Click Edit to start building your flow.
Managing your flows
From the flow overview, you can manage your existing flows:
Edit: Open the flow and make changes.
Export: Download the flow as a
.JSONfile.Delete: Permanently delete the flow.
When a flow is active, a green status indicator appears next to it. An inactive flow is shown with a red status indicator.
5. Choose a flow trigger
When you open the editor, you’ll see the Flow Builder workspace. On the right-hand side, you’ll find the available Flow Triggers.
A trigger determines when your flow starts. Choose one trigger to get started.
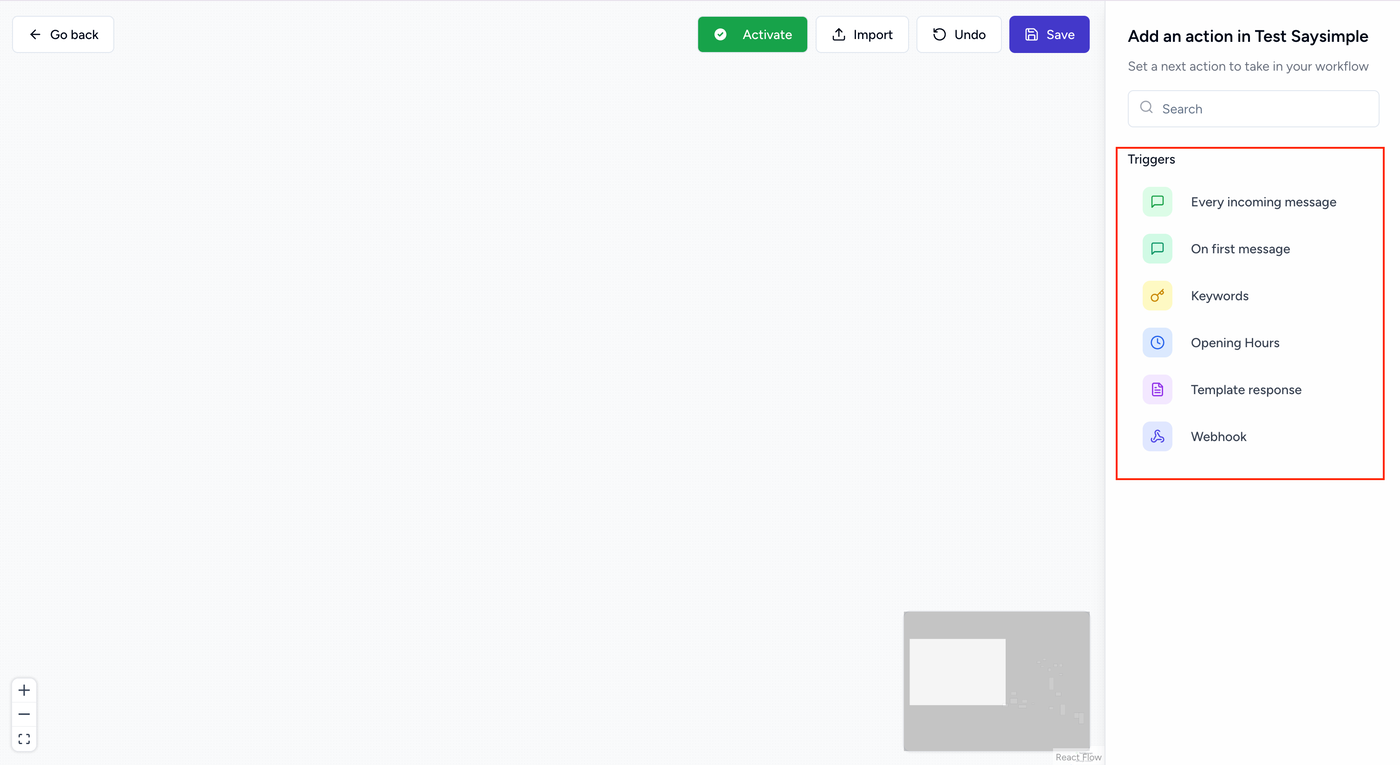
Available triggers
Every incoming message
Starts the flow whenever a customer sends a message.
On the first message
Starts the flow only when the customer sends their first message.
Important: This trigger must be connected to a Send template step. For example, you can create a welcome template with buttons that lead the customer through the flow.
Keyword
Starts the flow when a customer sends a specific keyword.
Hours of Operation
Starts the flow only during the hours you define.
Template response
Starts the flow when the selected template is sent.
Webhook
Starts the flow when an incoming webhook is received.
Important: The first message sent after a webhook trigger must be a template message. This trigger can also override an existing agent assignment in an ongoing conversation.
If the contact doesn’t exist in Saysimple yet, the contact is created automatically. The webhook must include the required name and phone fields.
Add a trigger
To add a trigger to your flow, simply drag and drop it from the right-hand panel onto the workspace.
Next steps
Now that you’ve created your flow and selected a trigger, you can start building the conversation using functions, variables, and actions.
Continue with:
Flow Builder: Functions and Flow Control
Flow Builder: Variables
Flow Builder: Actions